Invoice Component
What is the Invoice component?
Overview
The Invoice component is an important addition to your customer's sales invoice journey. When implemented, it's embedded in your invoice page throughout its lifecycle, from being created to being sent. It will provide actionable insights which are highly valuable when addressing invoices.
This is where your customers will be able to see if their invoices have the option to be paid online, available payment methods, limitations (if they exist) and even select a specific payment method for specific invoice.
Why you should implement this component
- With a minimal implementation effort, the Invoice component provides your customers with a great deal of value. Customers will quickly understand if an online payment is available for every invoice, remove limitations (in case their onboarding is incomplete) and select specific payment methods for that invoice.
- Implementing this component saves your team a significant amount of integration time.

The Invoice component adapts its messaging based on the user's onboarding status, available payment methods, and whether UNIPaaS-powered payments are currently enabled.

What does the Invoice component include?
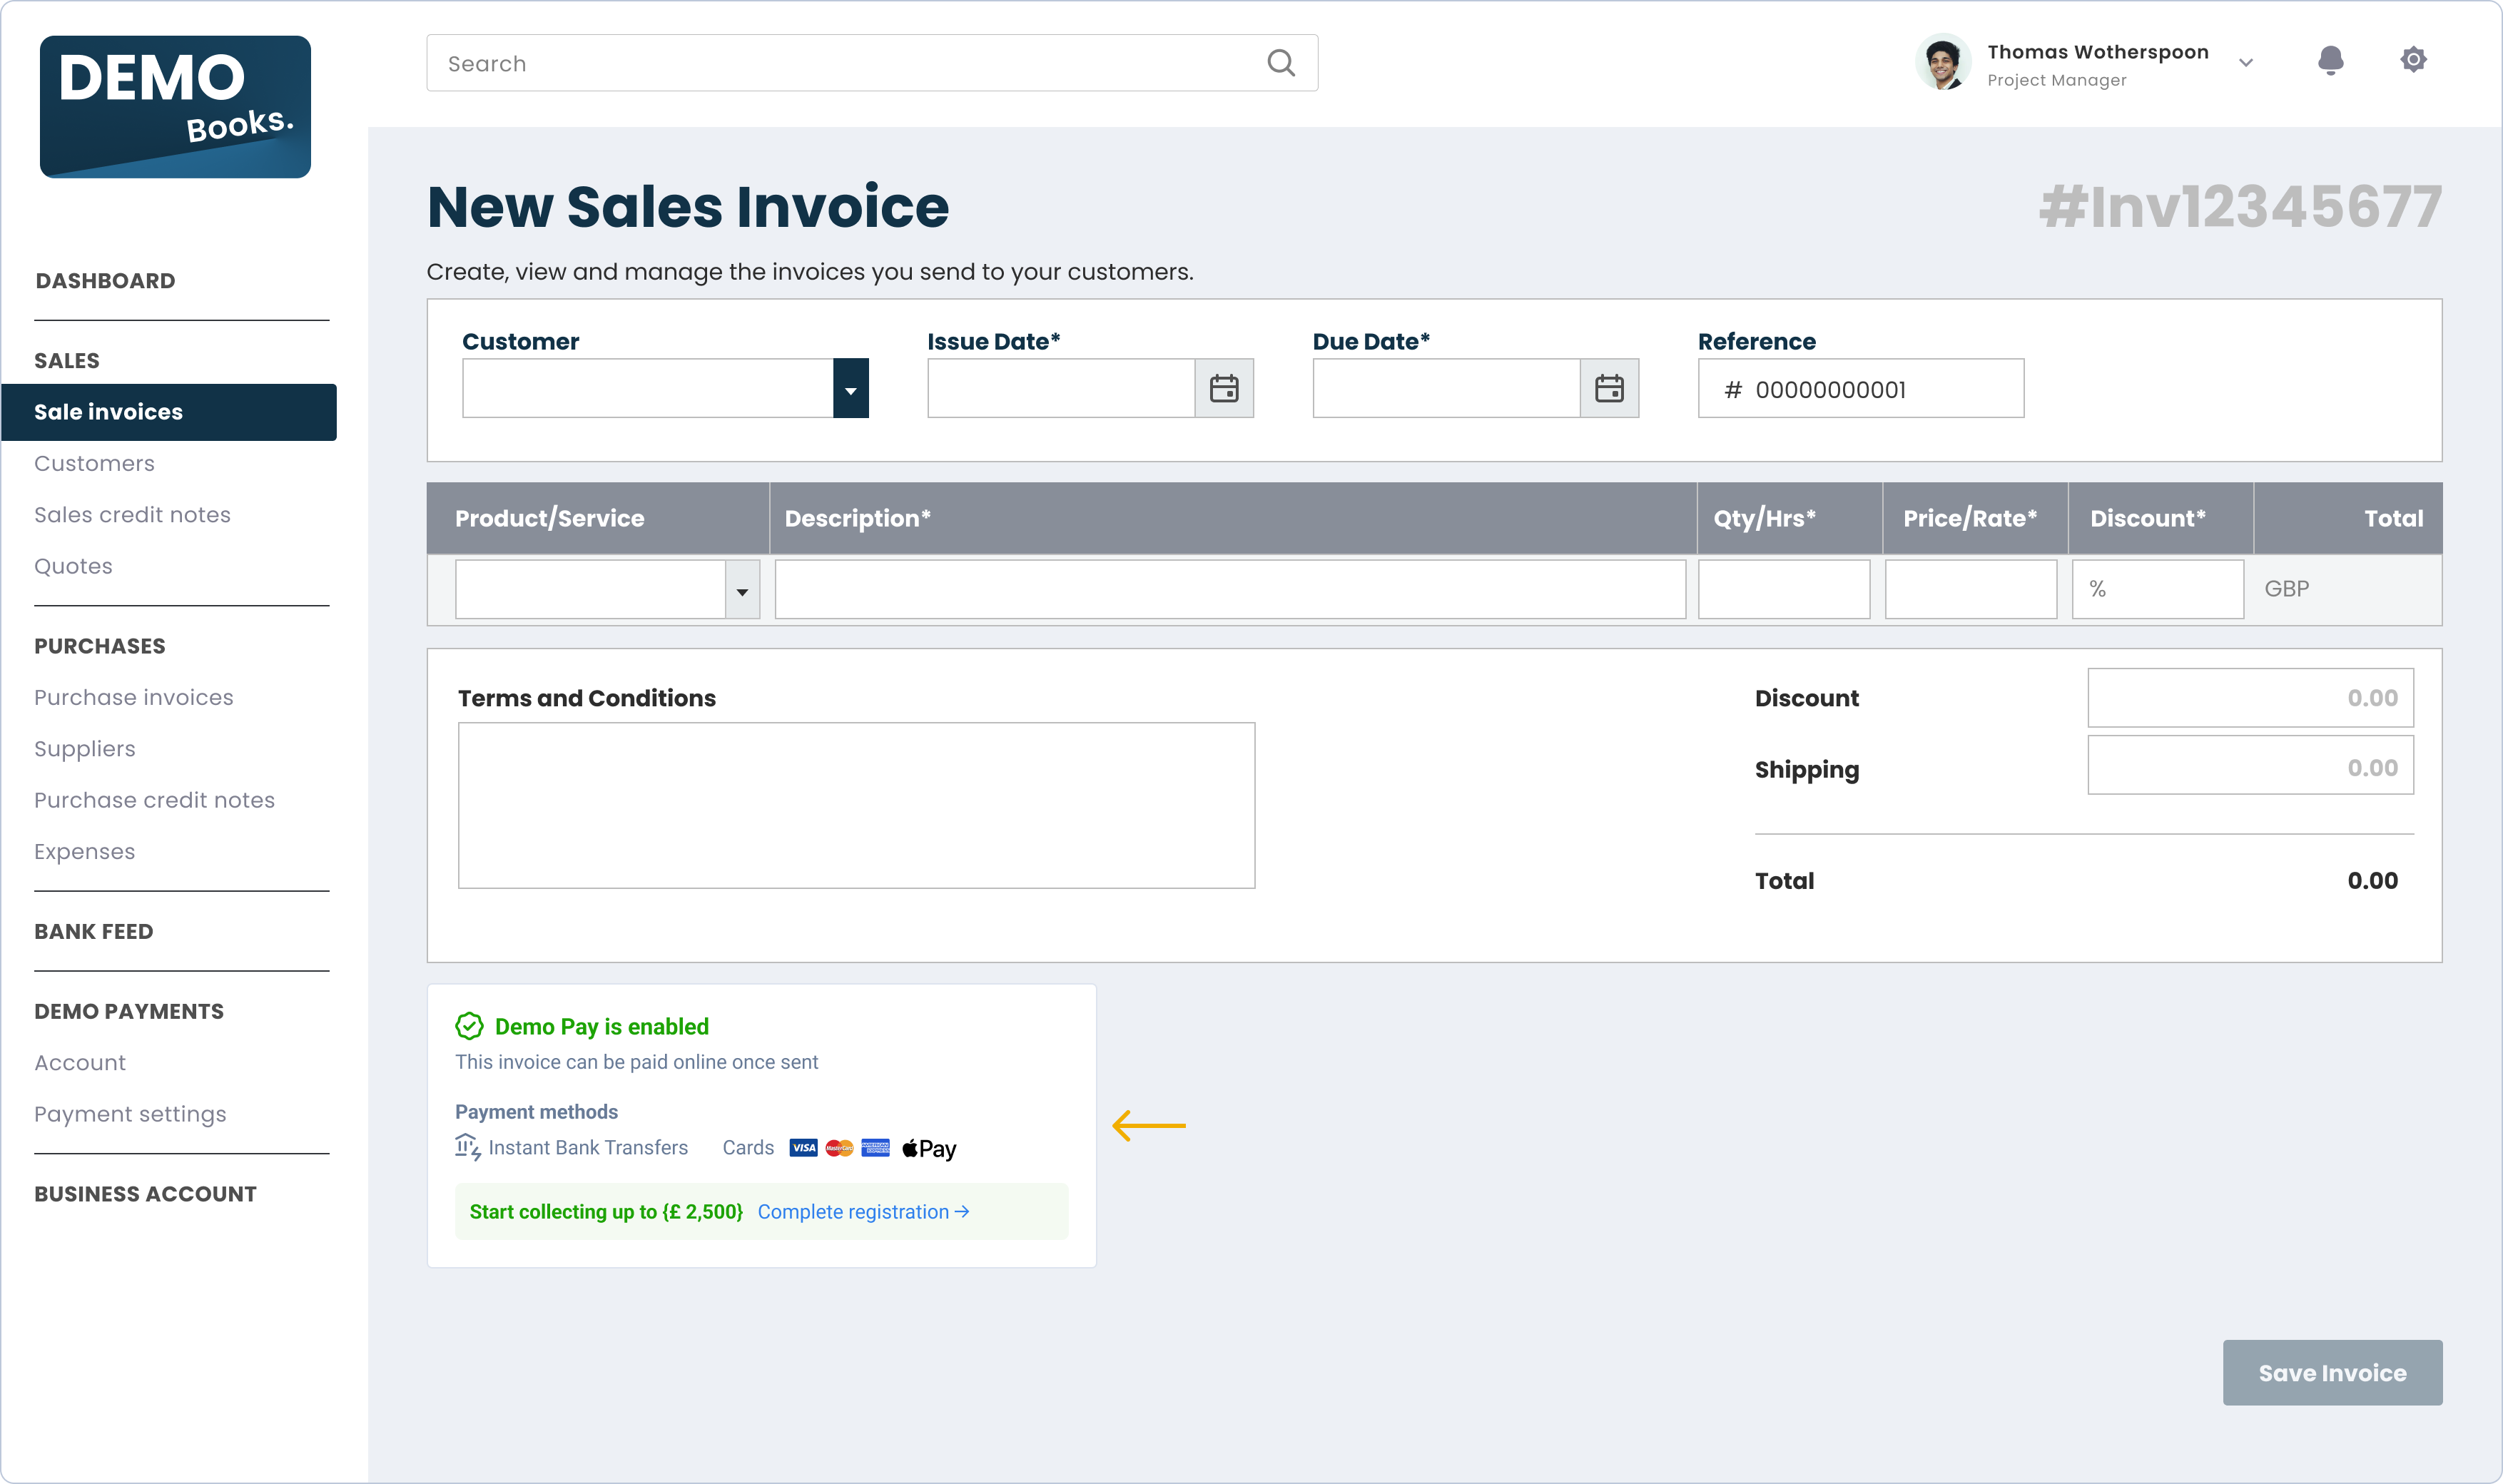
Invoice component enabled/disabled indication
This indication is important for your customers - it lets them know whether or not this invoice can be paid online using your embedded payment solution. If an action is required to enable the payment solution, this section will prompt your customers to take it.
Payment methods
The Payment methods section states which payment methods are available for this invoice. These include Instant bank transfers (via Open Banking), credit cards and APMs.
Onboarding status
A dynamic section that appears only if the vendor registration process has not been completed yet. It notifies your customers about any limitations that might apply to payment collection, and prompts customers to lift these limitations by completing the registration.
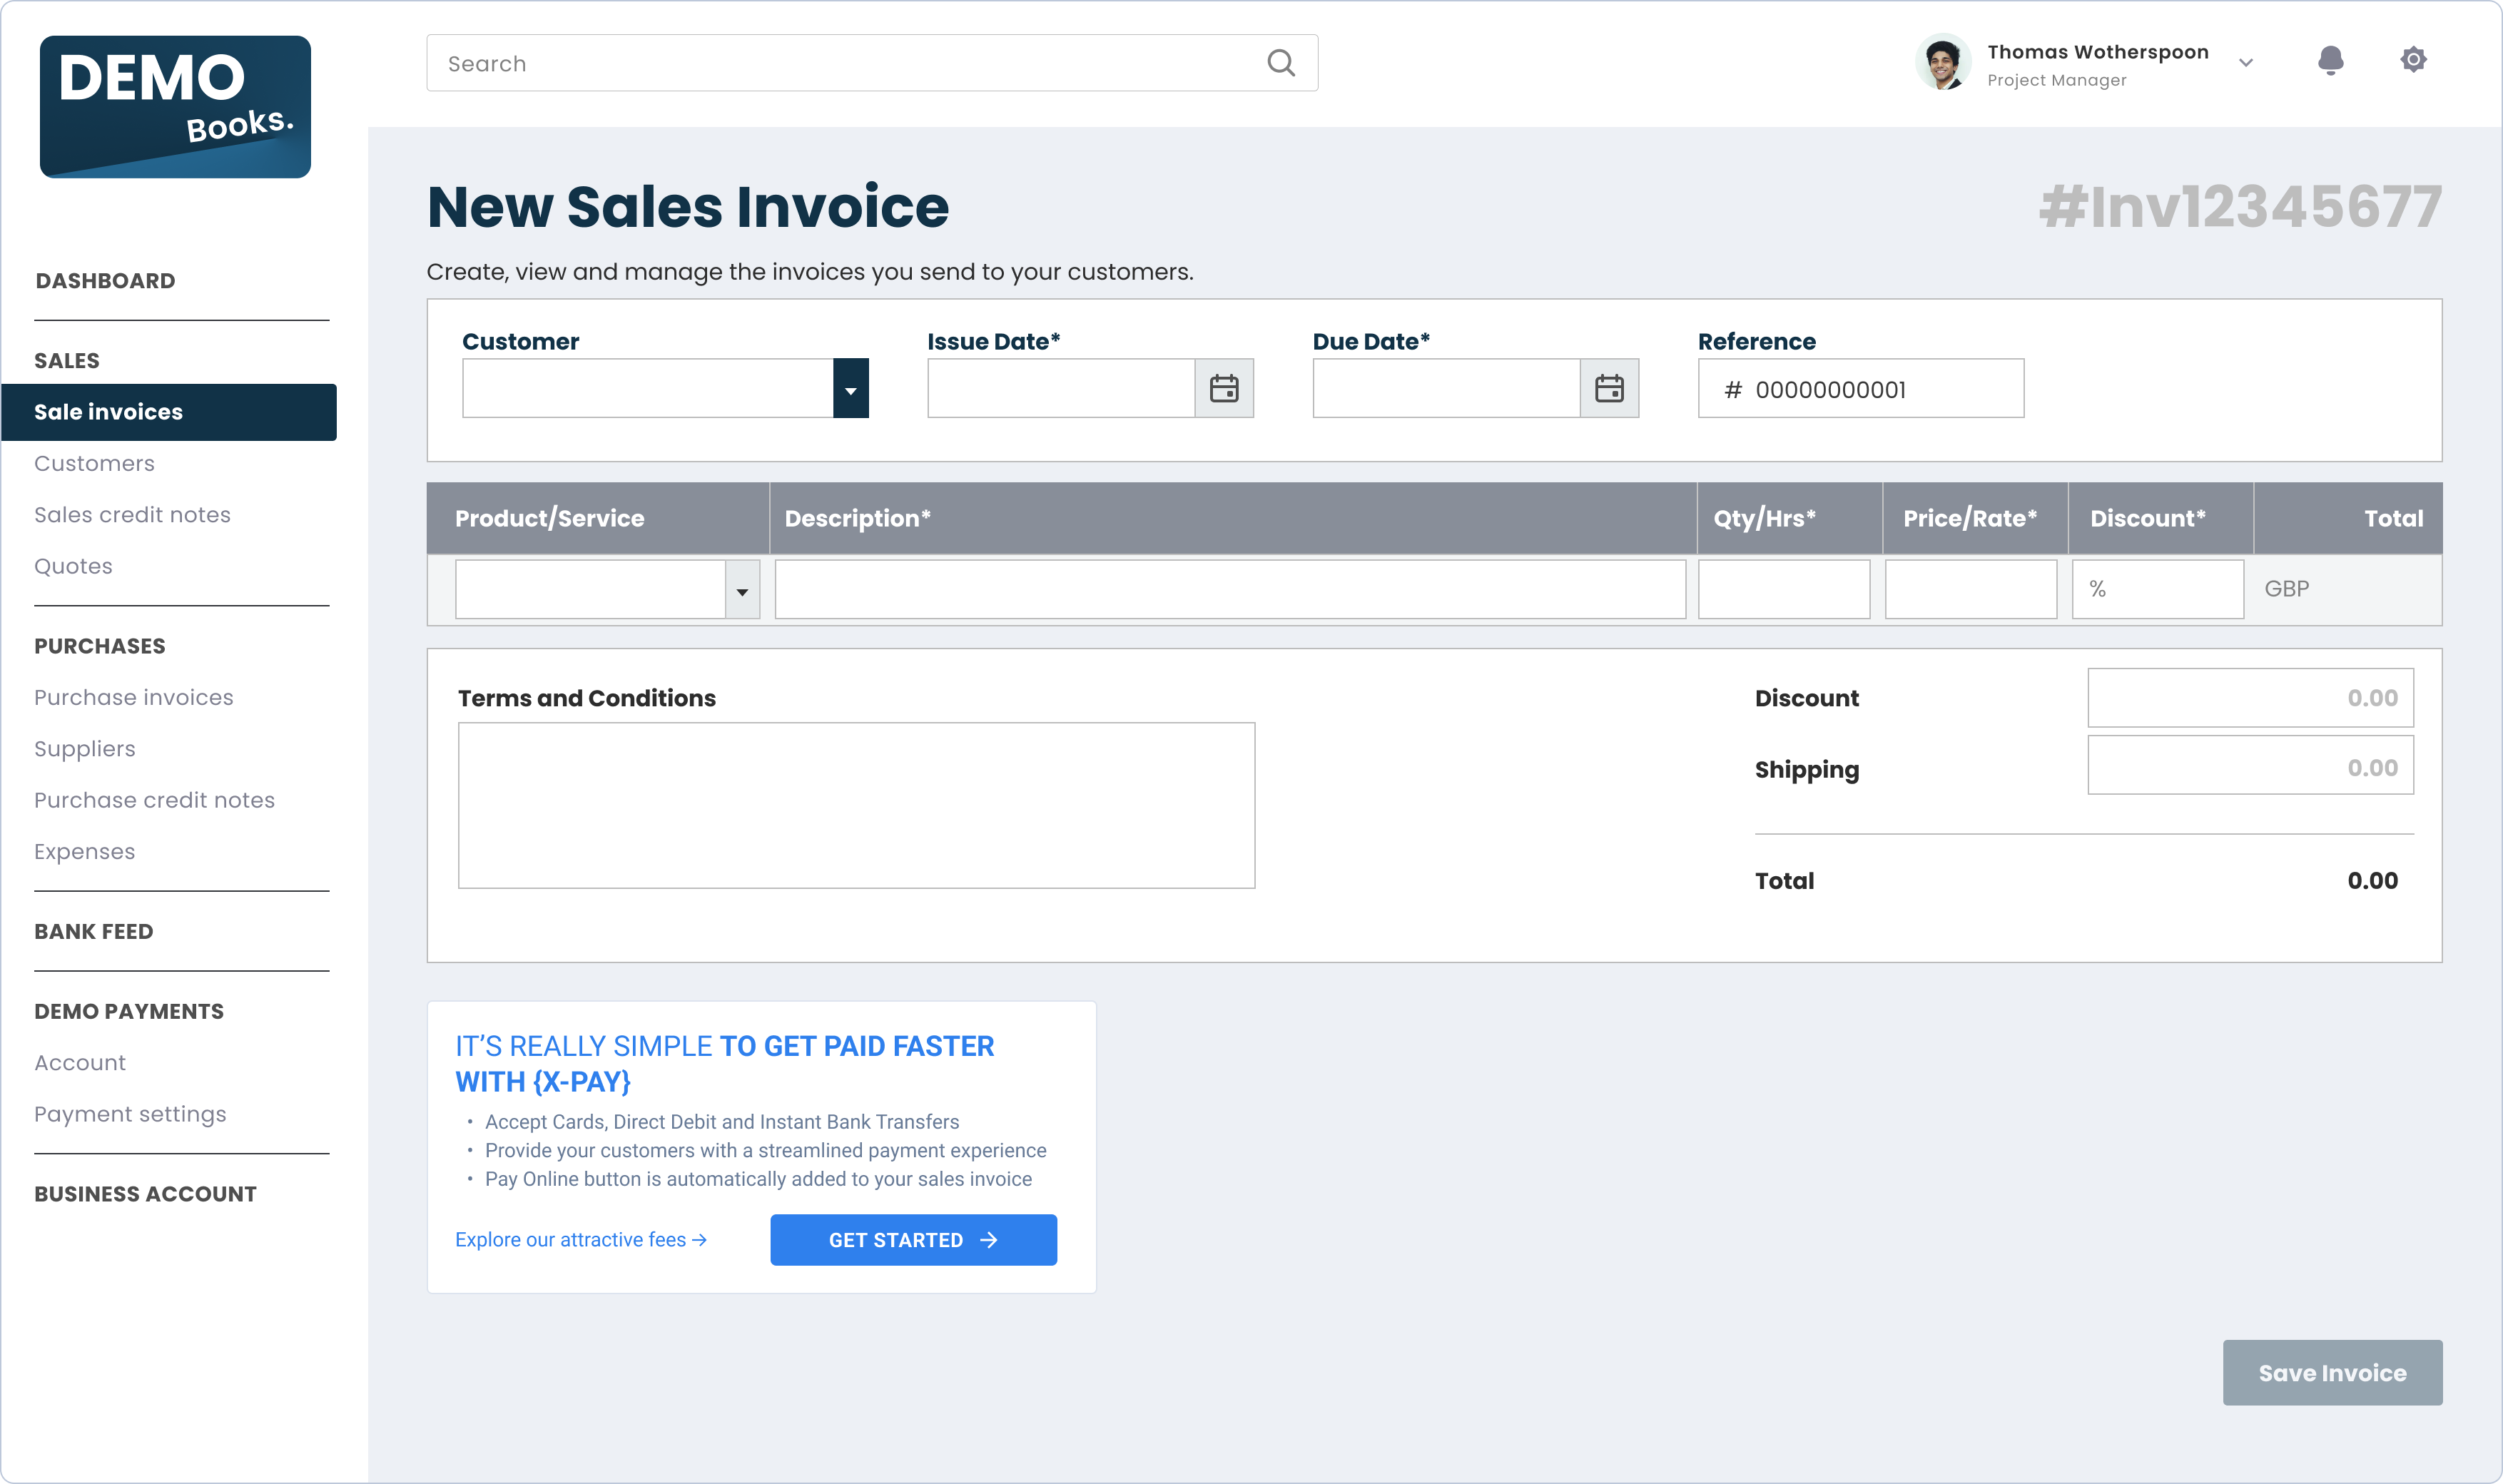
Component zero state
For platform users who have yet to sign up to your payments solution, the Invoice embedded component will show in a "zero state" view. This view's goal is to emphasize your payment solution's value and showcase its core features to potential users.
The "zero state" includes a prominent CTA and messages, incentivising your users to sign up to your payments solution. Additionally, it allows users learn more about it.
Triggering the "zero state" view
The "zero state" will automatically trigger once an access token is created without a vendor ID, meaning the user is not registered with UNIPaaS.

Where should I implement this component in my product?
The Invoice component should be implemented throughout the invoice journey, i.e. the component should appear on the invoice creation screen, on the invoice viewing screen (after saving), on the invoice editing screen, and on the invoice sending screen (if applicable).
The component will have slightly different functionalities, based on where it located throughout the invoice journey. UNIPaaS will handle these functionalities in the various states, based on parameters you provide us.
Before you begin implementation
-
If you have not set up UNIPaaS components, please complete all the steps in the UNIPaaS Components guide before moving forward.
-
Allocate the following space for this component:
- Width - 475 pixels (minimum).
- Height - 250 pixels.
For mobile: - Width - min 300 px
- Height - 250 px
- Required scopes:
Scope name | Description |
|---|---|
| Embedded Invoice GET permissions |
| Embedded Invoice component POST permissions |
How to implement this component?
To use the Invoice component, create an empty DOM node (also known as a container) in your page and give it a unique ID. This will be the place where the Invoice component will be mounted. Make sure to assign a unique ID to the container so that it can be easily identified and accessed.
<div id="invoice"></div>First create the container DOM node in your page, and then create below the instance and mount it to the container DOM node.
New sales invoice
To create the instance of the invoice component, and mount it to the container DOM node for new invoices (mode: 'create'), use the following code.
If there is a generated invoice ID for a new sales invoice, it is highly recommended to include it as part of the config at this stage:
<script type="text/javascript">
  const config = {
    mode: 'create', //mandatory
    invoice: {
      id: 'INV-123',//not mandatory, however, highly recommended if available
    }
  }; // UNIPaaS Components Invoice config type
  const invoice = components.create("invoice", config);
  invoice.mount("#invoice")
</script>
In order to dynamically update the invoice component in a real-time with all the required parameters, and ensure its proper functionality, please use the update method.
It should be used while users are filling out the mandatory invoice fields using your platform's UI, before they save a new invoice.
Please call the update method with the additional data (you can call this method multiple times with customer object or with invoice object separately):
//Use the variable from the previous step
invoice.update({
   customer: {
      id: '1234567', //mandatory
      name: 'John Doe', //mandatory
      email: '[email protected]',
   },
   invoice: {
      id: 'INV-123', //not mandatory, however, highly recommended if available
      dueDate: '2023-10-13', //mandatory
      amount: '20', //mandatory
   }
})
Existing sales invoice
For existing invoices that are already created on your platform (mode: 'view' or 'edit'), use the following code and provide the required parameters:
<script type="text/javascript">
  const config = {
    mode: 'edit', //mandatory: edit and view
    customer: {
      id: '1234567', //mandatory
      name: 'John Doe', //mandatory
      email: '[email protected]',
   },
   invoice: {
      id: 'INV-123', //mandatory
      dueDate: '2023-10-13', //mandatory
      amount: '20', //mandatory
   }
  }; // UNIPaaS Components Invoice config type
  const invoice = components.create("invoice", config);
  invoice.mount("#invoice");
</script>
ImportantIn order to ensure the proper functionality of the component, the following parameters must be provided.
Field name | Is Required | Type | Description |
|---|---|---|---|
| Yes | ENUM - "create", "edit", "view" | Create / Edit / View.
|
| No | Object | The unique identifier for the specific invoice. |
| No | Object | For Edit and View modes it's mandatory. |
Invoice events:
The Invoice component should interact with events that are on the platform side. In order to make the Invoice component fully functional, please implement the following component events.
startOnboarding- mandatorycompleteOnboarding- mandatoryenablePayments- mandatorysessionExpired- optionalgeneralError- optional
Use the following Javascript example snippet to listen and take appropriate action upon these events:
components.on("enablePayments", (e) => {
  console.log("enablePayments event", e.detail);
});
See the full list of events, which cover all UNIPaaS embedded components
Updated about 1 month ago
Ensure your vendors are kept informed and current with the Notification Component
